Thursday, December 28, 2017

Destiny 2 - First impressions


Back in 2014 when the original Destiny was released I played it through as a single player campaign and then didn't pick up any of the DLCs. It was a great game, but a little unbalanced for single player as it was made for co-op online. What I missed the most was the lack of split screen support so that we could have played it on the couch at home.

So, Destiny 2. I got the game installed last night on the Xbox One and played roughly an hour. Here are the first impressions.

Character creation


Pretty much like most games today, some preset faces for each race and you can then modify skin tone, hair, eyes etc and add extra markings if you chose to.
I just went thought the menus and jumped back out to start with my Destiny 1 character that was already pre-imported. Nice touch.


First hour of gameplay (spoiler alert)

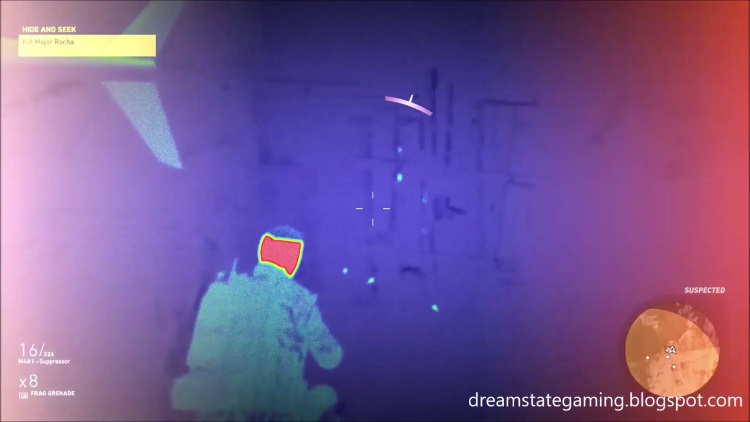
Here comes the first hour of gameplay with spoilers. (in the end a little less after I removed the loading screens.)


The game starts with a intro movie where an enemy armada destroys the Tower and attaches some kind of harness to the Traveller. After that sequence, your ship enters the atmosphere and you approach the Tower. Once you touch ground in what is left of the Tower Watch in the Last City on Earth you get the first mission.

Defend your home

With only a handgun (at least for me as a Hunter) make your way through the burning inferno that used to be your home. Once you get to the blue screen a wall will be destroyed to your right and two Cabal Legionary will enter the area that you are in. Kill them and walk through the hole.
Follow the corridor, more Legionary troops will try to stop you on the way. When asked to try your melee attack, do that and memorize the button as it will come in handy later.

Open the door at the end of the corridor and meet with Cayde, let him neutralize the troops in the room, no need to waste ammunition.

Find Zavala

Move up the stairs and past the guards and civilian refugees to the Armory.

Gear up for the fight

Pick up a better weapon and open the door. Down the stairs, throw a grenade at the two Legionary troops at the bottom of the staircase. This was the first ammunition drop from enemies that I had, walk over the white and green boxes to pick up the ammunition.

Continue forward through the burning corridor.
In the next room climb the stairs and jump up to the platform.

Tower Hangar

More Cabal troops here and now it gets dark luckily there is an automatic flashlight that is turned on so no need to find the correct button for that.
In the next room, there is a Centurion with extra armor. I.e. need to take out the armor first and then the health bar. For me, a grenade did the trick!
After that more troops arrive in the room that need to be cleared.

Open the door to enter the Hangar.
Even more troops here. Just continue forward.
Use your Ghost to find your next waypoint. Should be up ward on a wall with a large letter M right next to it.
Crouch through the low tunnel.

Tower Plaza


Move towards the Plaza.
More troops are landing here so watch your angles.

Defend the tower

Run up to the tower entrance and meet up with Zavala.
Defend the tower for 3 waves. Whenever Zavala yells at you to get inside his shield, do that.
When your special ability gets maxed, don't use it directly. Save it for the Centurion that arrives at the end of the first wave,

Leave the plaza and find the Speaker

A new waypoint should appear to your right, at the entrance to the Tower North. Meet Ikora Rey there. Ignore the waves of Cabal troops that arrive at the plaza, you have a new mission now so just run past them.
Ikora will inform you that the Speaker has been taken.

Board the command ship

Continue fighting your way forward and watch out because now you will meet Incendior troops with flamethrowers. Their critical hit point is the fuel tanks on their backs. Fight your way to Hollidays ship. Before boarding you will have to take out a Honored Centurion, hopefully you have saved your special ability to this fight, if so then it should not take any time at all. Otherwise you are in for a little grind.
Board the ship that arrives afterwards.

The Immortal, Command Ship, Disable the shields

Run up the ramp and into the ship. Double jump up on the platform above where the drop-spheres appear. Kill the Legionary troops in the area. Approach one of the terminals and [Download Schematics] to open the golden shield door.
After the three troops in the next room you will need your light gun again as Pashk, the Searing Will will come at you. If yours is not loaded, then just try to critical hit him in the head, he takes some damage that way.

Move upwards on the ramps
At the top there is a door to the roof, watch out for Psion troops. Low on health bug large on damage, i.e. snipers. And there are a lot of them combined with ordinary Legionary troops and a few Incendior. After you enter the roof the next yellow guy will arrive as well to spice things up a little, Brann, the Unbent Blade. Even with the special ability he does not take that much damage so here you will be up for a grind. Just keep to cover and shoot him and the other troops, hopefully your special will reload so you can use it a second time on him. Don't forget your grenades!

Move into the doorway that Brann, the Unbent Blade was guarding and drop to the lower levels. In this area there are troops both above and below. Move to the lowest level and open the door to the next room filled with Cabal troops.

Kreth the Living Skyfire is the last boss guarding the Shield Generator room, use your special ability to take him out. Not at all as much health as Brann.

The Shield Generator

The key here is to shoot the three turbines below the main generator. The first one is visible from the platform that you look down from. For the other two you will have to jump down and move close to the wall (on top of the narrow platform, not all the way down where the generator arms will kill you.

After the turbines are down, exit the room and follow the burning corridors to the platform where you will meet your ride out!


The Last City, 2 days after the attack

Make your way to the old river bed and walk below the bridges to the right. Approach the blue dot of light in your way. Wait until your Ghost heals you and continue forward out of the city.

City Outskirts, 4 days after the attack

Approach the camp site and get the submachine gun from the ground. 
The dogs that will attack the camp once you move outside can be killed with one melee blow, so use your bullets wisely and use melee when possible. The first one the Honored War Beast is yellow so it requires bullets.

Twillight Camp, one week after the attack

Follow the bird.
Up to the top, down to the next valley.
Once you get to the drop you should watch out. One Legionary will appear with more dogs. And even more dogs.

Once the dogs are out of the picture, move forward. Another drop followed by a tree branch over another gap.

Try to get to the bird. The last jump seems a little too long but you should try it anyway. Falling down is part of the script.

So now you have completed the intro of Destiny 2. Enjoy the last scripted sequence and arrive at the Farm and let the game start for real!


Conclusions

After playing the introduction with a trial version I ended up buying the game. Real nice storytelling that got me hooked. 
Is it revolutionary? No not really. But it is fun, lets see how the real gameplay turns out in future posts.


Hope this helped someone out there! : )

Monday, December 25, 2017

Tom Clancy's The Division Garment District Virus Research


Another Virus Research mission walkthrough.


  • Start the mission by starting the first scanner
  • Run forward and open the door in the next room
  • Take a left and run past the ladder to get the next scanner against the wall
  • Climb the ladder to the first platform
  • Climb the yellow building material rolls and then climb the wall
  • Run to the window 10 meters forward and enter
  • In the staircase, go up one level to find the last virus scanner
  • Run to the upper level and open the door to the roof
  • Watch out for the cleaner patrol on the roof, neutralize them to gain access to the data upload equipment
  • Complete the mission by uploading the virus data to cloud

Sunday, December 17, 2017

Warhammer The End Times Vermintide - First impressions


So I picked this up from the Xbox Live membership deal. And do I feel lucky that I never bought it before.. This is a multiplayer only co-op game.... And with random groups that do not know squat of what they are doing (including me)...
So, I was hoping for a Warhammer single player campaign, instead I got to shoot rats with other people....

Character creation

You don't.. You select one out of 5 characters to play.. But then when you join a group you can select another if the one you chose was already taken in that group. So no real RPG feeling here.

Gameplay

Healing seems to be a bit lacking... And once the whole team is down, you have to start the mission from the beginning.. So.... Either that I do not understand what is going on.. I managed to drink my only healing potion but that seems to be it...


I will probably not play again as this is not the game I thought it would be.

Until next time: How we stopped being victims of the system and started to create a life

Saturday, December 16, 2017

Tom Clancy's The Division Midtown East Virus Research


  • Activate the first Virus Measurement Equipment
  • Run left towards the staircase to the basement. 
  • Follow the corridor to the control room and Use keyboard there to activate the power in the building
  • Follow the corridor and interact with the Shipping and Receiving door controls.
  • Take the elevator back upstairs
  • Run forward from the elevator
  • Activate the blinking green button on the wall to open the store
  • Boot up the scanner in the store
  • Run through the CERA pathway
  • Activate the ventilation
  • Run right
  • Take the staircase to the upper floor
  • Activate the blinking green button on the wall to open the store
  • Boot up the scanner in the store
  • Run right/forward and through the next store
  • Take the next elevator to the roof
  • Run to the other side of the roof and Send data
Mission completed


Tuesday, December 12, 2017

Tom Clancy's The Division Chelsea Virus Research


Virus Research mission in Chelsea is pretty simple.

Initiate the virus scanner sequence

Run through the opening in the fence and activate the second virus scanner in the corner, below the ladder.

Climb the ladder to the roof.

Climb the ladder to the left.

Run through the roof-tops in counter-clockwise direction.

Beware of the Cleaners on the second roof. Take them out and continue running over the roof tops.

Upload the data, complete the mission.

Tom Clancy's The Division Missing Person Heather Lau


This mission is available from Camp Hudson, the first area that you get to when you first arrive on Manhattan.
The mission is to find Faye's sister and bring her back to her sister.


Part 1.

The refugee camp just outside of Camp Hudson, activate the echo and investigate the guitar player and the guitar case on the ground.


Part 2.

The next part is in Pennsylvania Plaza. Activate the echo in the street outside the apartment building and investigate the girl at the door to unlock the next part.


Part 3

Head to the back alley behind the apartment building. Clear the street of gang members and activate the echo. Investigate the gang members looking up to unlock the next part.

Part 4

Climb the ladder just above the echo and enter the apartment through a window. Open the door and listen in on the call from Heather to Faye (yay, she's alive). Climb the stairs to the top floor and enter another apartment. Approach Heather to complete the mission.


Sunday, December 10, 2017

Tom Clancy's The Division Exploring Brooklyn


So 2 friends actually started playing the Division yesterday and I ended up rolling a new character and thus getting to roam Brooklyn again.
The first time here I didn't really explore that much, but now there was time and I wasn't overwhelmed by the game anymore.
Quite a lot of detail in this area even though there seems to be no hidden areas (what I could find at least). From the view to Manhattan to all the car and truck wrecks beneath the bridges and the random encounters with hostiles.

Fun thing: All cash is shared between characters so always being able to buy the best from vendors is nice.
Sharing the vanity wardrobe between characters was a little less fun imho, as I would only want to reflect the progress of this character... So I guess I'll just keep the starting clothes for a bit.

Tom Clancy's The Division Bounty Sergeant Belden


2 lieutenants and then Sergeant Belden.

Tom Clancy's The Division Missing Person Bernard Gamble


Finding all the 3 echoes and finally the guy Bernard Gamble.

The mission is to find and extract the LMB (Last Man Battalion) defector Bernard Gamble. JTF already sent a squad to do the job but they haven't reported back. So you will need to do the job.

Part 1.

Watch out for LMB squad on the streets with Sgt. Jacks (elite). Not a part of the mission but he roams the streets and can add an surprise element. He also has a shield so be sure to check your aim.
Take the ladder to the roof and activate the echo. Investigate the echo to unlock the next part.

Part 2.

Next part is couple of blocks to the south. Get to the inner yard of the current block (no need to get back on the street with the elite squad.
Be sure to keep an eye out for booby traps.
At this point I decided to run back to the safe-house to get more ammunition.
The next echo is directly in the lobby of the marked house. Don't forget to investigate the echo to unlock the next part.

Part 3

The next part is again directly to the south in the alleyway.
Again watch out for booby traps inside to building. Here we find our what happened to the JTF squad that got the original mission. Go up the stairs to investigate the echo and unlock the last part.

Part 4

Again just over the street. Watch out for LMB patrols. Directly on entering the building, you should get markers on some enemies. Take them out, find the holding room and open the door to rescue Bernard Gamble.

Tom Clancy's The Division Turtle Bay Hostage Rescue


Finding the key to the cargo container was a bit tricky, but it is on the upper plane. See the video for exact way of getting there.

Tom Clancy's The Division Turtle Bay Virus Research


Doing the Virus Research side mission in Turtle Bay. It is always recommended to try to find all the data collectors before starting the mission to get rid of the time pressure element.
I didn't run into any enemies on this mission but who knows... Going through the area once before starting and you can get rid of them as well without the time running.

Tom Clancy's Ghost Recon Wildlands Koani Gasoline Raid


Stealing the helicopter and flying it to a rebel camp on the other side of the salt desert in Koani.
Also picking up crate containing Sniper Rifle SR-1

Tom Clancy's Ghost Recon Wildlands Monte Puncu The Barbie House


Exploring Monte Puncu and came across this piece of history... Evidently some Nazi took his refuge in Bolivia after the second world war ended. More information over at Wikipedia.

Tom Clancy's Ghost Recon Wildlands Monte Puncu Food Package Raid


This one was a bit trickier, no clear sight lines to the target location, meaning that sneaking up close through the forest was the only option. Evidently I got a bit closer then I thought as the enemies suddenly popped out directly in front of me!
Also picking up crate containing Scope EXPS & G33

Tom Clancy's Ghost Recon Wildlands - Flor de Oro - Gasoline Raid


Going in from high ground and taking out the guards one by one without alerting the others.
Also picking up crate containing Light Machine Gun Muzzle

Tom Clancy's The Division Lincoln Tunnel [Hard]


Another story mission with a random group. A pretty straight forward run, still trying to get the timing and accuracy right but I think that I'm getting there..


Sunday, November 19, 2017

Tom Clancy's The Division Gramercy Crashed Drone

This one was a little bit trickier. The key was to find the bridge between the two rooftops. I.e. access the roof of the building next to the one with the drone and use the bridge.


More drone locations:
Tom Clancy's The Division Clinton Crashed Drone
Tom Clancy's The Division Flatiron District Crashed Drone
Tom Clancy's The Division Gramercy Crashed Drone

Tom Clancy's The Division Flatiron District Crashed Drone

Just climb the rope from the road. Nothing tricky with this one.

More drone locations:
Tom Clancy's The Division Clinton Crashed Drone
Tom Clancy's The Division Flatiron District Crashed Drone
Tom Clancy's The Division Gramercy Crashed Drone

Tom Clancy's The Division Clinton Crashed Drone


You have to access the roof through the apartment building, just enter the doorway from the street.

More drone locations:
Tom Clancy's The Division Clinton Crashed Drone
Tom Clancy's The Division Flatiron District Crashed Drone
Tom Clancy's The Division Gramercy Crashed Drone


Tom Clancy's The Division Hudson Refugee Camp [Hard]


After 3 hours of matchmaking I finally found another player to enter the Hudson Refugee Camp. Went well, the group disbanded on the final boss but was no problem to complete it solo.

Saturday, November 18, 2017

Tom Clancy's The Division - Returning after some time


As state in my previous post, I decided to give The Division a go today.
After a successful mission (Police Academy), the reality hit and the match making system didn't provide any matches anymore for the other Daily Mission.
After running around and doing side things for 40 minutes I gave up and logged out.

A shame. Maybe it was the time of day or my low gear rating. Anyways, the player hubs seemed to be full of players with maxed gear rating, I guess they still can find groups. But if you, like me do not have that... Then its the waiting game that seems to be the option.

I don't know how much I will end up playing... At least Tom Clancy's Ghost Recon Wildlands you can play solo with no problems.

After trying again some hours later, the same thing happened. No matchmaking.
Good thing tho, they have made it possible to acquire gear by doing solo things in the city, i.e. random encounters. So I've actually gained some gear level today.

Still a good game, but the matchmaking system is kinda broken if you are not on max level (or if I just don't understand how it is supposed to work)


Day 2 update
So gave it another shot, and I now understand why the matchmaking is not working... The gear you get on the streets is just so good that the daily missions are pretty useless. Just roam the streets and find the phones/drones etc and you will gain gear levels. Just remember to up the World Tier Level whenever available.

Day 14 update
So I've been grinding gear score for two weeks. Pretty fun to go through all the extra content in the form of phones, incident reports, drone sites etc. Fun enough to recommend 2 friends to buy it when it was on sale ($10). If you have friends to play with, this is a really fun game, otherwise I hope you like the solo grinding, some of us do but most do not.... : )

Tom Clancy's The Division - Police Academy [Hard]


Dusted off this game today, first time in a year or so.
Some adjustment to the controls at first, but after some minutes I remembered the Skill Sets on the right and left bar and we were back in business.

Daily Hard Mission, the Police Academy. Joined a random dude and after the first wipe it went pretty easily through.
Good game.


Next post: Tom Clancy's The Division Returning after some time

Friday, November 3, 2017

Cuphead - The Root Pack in Botanic Panic


Started playing Cuphead this weekend, first impressions 'well made'. Damn I could sit all day and just listen to the soundtrack! The feeling is just right.
Classic atmosphere but hard and totally unforgiving! I like it!

For more Cuphead videos on my blog:
Cuphead - The Root Pack in Botanic Panic
Cuphead - Ribby and Croaks in Clip Joint Calamity
Cuphead - Mausoleum I
Cuphead - Forest Follies

Sunday, October 22, 2017

Tom Clancy's Ghost Recon Wildlands - Montuyok - Rebel Op - Food Package Raid


This time we do the Food Package Raid in Montuyok. A little tricky as the cartel uses the base as training ground for its soldiers, i.e. not just the ordinary helicopter crew guarding the spot.
As always, once you get into the helicopter, check the map to see where you are going and fly as low as you can to prevent missile locks!

Thursday, October 12, 2017

Tom Clancy's Ghost Recon Wildlands - Montuyok - Rebel Op - Medication air transport


A video of the Rebel Op, Medical Air Transport side mission in Montuyok. The hardest part is always the approach with the airplane, so many times that you hit something with a wing and have to start over. This time, no problems.
On the flight, there is a radar lock on the airplane, just make sure that you fly very low and this should not be a problem either.


Util next time, Abrupt reminder of mortality

Sunday, October 8, 2017

Tom Clancy's Ghost Recon Wildlands - Tower Cast Western Precinct


From the Fallen Ghosts DLC

Tom Clancy's Ghost Recon Wildlands - Saving La Granja


From the Fallen Ghosts DLC

Tom Clancy's Ghost Recon Wildlands - Headhunter Northern Precinct


From the Fallen Ghosts DLC

Tom Clancy's Ghost Recon Wildlands - Headhunter Northern Precinct
Tom Clancy's Ghost Recon Wildlands - Headhunter Eastern Precinct 
Tom Clancy's Ghost Recon Wildlands - Headhunter Western Precinct 2
Tom Clancy's Ghost Recon Wildlands - Headhunter Western Precinct

Tom Clancy's Ghost Recon Wildlands - Ghosts


From the Fallen Ghosts DLC

Sonic Mania - Xbox One

Sonic Mania!
The 25 year celebration game, but is it worth the money?

Short version, no.. Was fun for one evening, should have been $5 instead of $20 in my opinion.


But then again, I was never a Sega kid.. So maybe my opinion is a little biased... : )

Saturday, September 9, 2017

Tom Clancy's Ghost Recon Wildlands - Headhunter Eastern Precinct


From the Fallen Ghosts DLC. Find the extranjeros mole
Tom Clancy's Ghost Recon Wildlands - Headhunter Northern Precinct
Tom Clancy's Ghost Recon Wildlands - Headhunter Eastern Precinct 
Tom Clancy's Ghost Recon Wildlands - Headhunter Western Precinct 2
Tom Clancy's Ghost Recon Wildlands - Headhunter Western Precinct

In this headhunter mission the clues point at a person wearing a shirt with a yellow pyramid on it, a tree close to a hut and some cloth as seen in the following picture

Clues for the target

After some flying around I found the target at the following location. Red circle on the map below


Hope this helps someone out there!

Until next time: Work to Live, Don’t Live to Work

Tuesday, July 25, 2017

Mass Effect: Andromeda - A Better Beginning - The Vault


I take it that you have made your way to the Gravity Well down to the Remnant Vault by your own.

First task is to open the door in front of you, the Power Console is on the opposite side of your starting position.  Follow the side and activate the Power Console to open the door.


Next start your Scanner and follow the yellow power conduit from this console further into the Remnant Vault.


In the next room, use your Scanner on the console located there. SAM will tell you that it is linked with surface facilities but that it is not operational. Continue through the next door.

Check out the other Gravity Well (don't walk into it as it deals massive damage). Peebee goes solo from here.  Follow the radar beacon to the next door.

In the next room, the floor is lava (or some other liquid that deals damage, scans to Unknown Ferrofluid). Use your jetpack to jump to the next surface.
After jumping on the blocks to the next platform take cover as there will be Remnant Assemblers. Take them down and continue

Use scanner to find the power conduit and follow it to the next waypoint.


In the next area, don't miss to open the door. to the right hand side it contains a loot container. The door can be Scanned.
After the side door, after the next turn there will be more Remnant Assemblers. Do your thing

After that follow to the next waypoint. On your way there you will get a hint to Press RT and you will see Peebee on the other platform.
Don't walk directly into the next door, instead follow the platform around the next corner to find another extra door with a loot container in it.

After the next door in the dark tunnel, the spinning light cube can be Scanned. Then another door followed by Remnants... This time Remnant Assemblers, Observer and a stationary Turret.

After the have been dealt with you can activate the Gravity Well. Climb both the platforms overlooking and activate the consoles. On the left side you can also scan the Remnant Shield Charger in front of the console.

Take the Gravity Well down to the next level.

Turn around and scan the leaking conduit. On the left hand side there is a loot container.
Press RT to look at Peebee and let her help you fix the conduit.

Go through the door.

Use the console and then jump with the jetpack onto the platform that appears.

This is about 24 minutes into the video

On the platform with the strange tree (Scannable), activate the next console and jump the platforms that appear. On the next platform take care of the Remnant Observers that appear and activate the console there. (here I think that I missed a secret door and loot, it looks like a door if you continue further onto the platform after the console, worth checking out)

Head back to the tree.
Next platforms appeared to the left of you. This one you need to run-jump to get across.

Another console. Triggering it will activate more Remnants on your path. After that is done, go to the platform where they came from. The one with the second tree.

The console there will trigger a bridge, just walk over it to the final platform and door.

Follow the platform to the left first before entering the door, another loot container.
Enter the door.


Fix the thing by activating the console (surprise surprise)

About 35 minutes into the video

I'm not going to write about the next part. If you have trouble finding the way, here is a direct link to that part in the video instead. It gets a little hectic.

Thank you for reading, hope this helps someone out there! : )
Until next time: Work to Live, Don’t Live to Work

Saturday, July 15, 2017

First Impressions - Mass Effect: Andromeda


I have been a fan of the Mass Effect series since the beginning and when they announced Andromeda, I knew I would end up playing it. So now, a few months after the release I got around to actually buying it on a bargain.
The story takes place upon arrival to the Andromeda galaxy after a 600 year voyage. So I guess we can throw out all we learned from the previous trilogy and hopefully explore something new both with the story and races. So hopefully no more running around the citadel!

Spoiler alert! Do not read further or click on the videos if you want to have a spectacular first hour of gameplay. If you are unsure about the game and don't care of the spoilers, then go ahead. You have been warned!

Character creation


A lot of options here, what I found nice was the combination of presets and freedom. But dull as I am I went the middle road. A nice touch was that you were able to design the other gender twin to your liking as well even though I guess you will not play as her/him.
Really liked the multitude of hair color choices, but the lack of tattoo designs pulled it down. The ones that are there are well designed but not thrilling in any way.
A nice touch that you are able to select the gender of Shepard from the previous games, makes sense as people played him/her differently.
After that there is the training choice:

Security with starting power Concussive Shot, heat-seeking high impact shot
Biotic with starting power Throw your enemy through the air!
Technician with starting power Overload with damage to shields and synthetic enemies
Leader with starting power Energy Drain that moves energy from your enemies shield to your own
Scrapper with starting power Charge that lets you enter the heat of battle fast.
Operative with starting power Tactical Cloak that lets you stealth

My choice: Security.. mostly as that resembles what I use to play in Mass Effect games. At least the first time through.

Gameplay introduction


The story starts directly and the tutorial part of the game is pretty much integrated into the fact that you have slept for 600 years and that people on the ship know you and seamlessly tell/ask you to do stuff. Introduction to the scanner is done, seems like a neat thing to analyse things in the game world.
Nice intro, gets you into the story.

Also the dialog system has been redesigned. Now each of the four choices has a clear category, Emotional, Logical, Casual and Professional. It seems that the old Paragon/Renegade system is gone. 

First mission


Here we start to see how stunning the game actually is! The scenes on the planet surface, it is as the trailer promised! And jumping! I can't understand how many games lack the jump feature these days, but here it is part of the game play. You have a little thruster on your suite that allows for jumping over obstacles. Also climbing is a feature.
The last few months I have been playing Tom Clancy's Ghost Recon Wildlands and I really do miss the detailed weapon feeling and ability to take cover a bit more deterministic. The worst thing about combat in Mass Effect: Andromeda is that you cant toggle right/left shoulder camera while in combat. It gets really annoying while crouching in cover. It turns out that you can switch the camera from one shoulder to the other by pressing Right Stick. Now the combat actually works!.. Just not used to the arcade feel when switching from a more realistic game to this game. : ) It is the same old Mass Effect combat.

Conclusions

After the first hour or so of game play, I am hooked. Just hoping that the story is just as long as the other Mass Effect games. Really stunning graphics, a story that pulls you in and a re-designed dialogue system is a step forward at least in my opinion.
Looking forward to continuing.


Thank you for reading, hope this helps someone out there! : )
Until next time: Work to Live, Don’t Live to Work

Saturday, July 8, 2017

Tom Clancy's Ghost Recon Wildlands - Hide and Seek


From the Fallen Ghosts DLC

I decided to enter the base from the south, i.e. high elevation.
In the camp there are a huge number of stealth operators, 4 jammers and a bunch of snipers. Meaning that you should make sure that you have looked at every inch of the base with the help of heat-vision on the drone. Make sure you find the generator and alarm while looking around.

Once done

  • take out the Alarm,
  • follow with targeting the guys that carry the jamming equipment, this will alert the base but you should be OK as you are up in the hills and the alarm is disabled. Use sync-shot and take out the fourth yourself.
  • Take out whoever tries to come to your location and try to snipe everyone in the base at the same time before entering. There is a cluster of snipers in one of the towers but it is hard to target them while they stay up there, once the alert is up they should be moving to a better location. 
  • As you are already engaged, throw in some mortar fire to take out the generators located against the building closest to the southern hills.
  • Once the base has been cleaned up a bit it is time to enter it. Go over the planks from the hills to the rooftop as seen in the above image (right of the generator).
  • Clear the base and rescue the rebels (or not, not mission critical but there is a guard down there that you probably missed). Make sure you don't shoot any rebels while you use the thermal vision, hard to tell the difference between people when everyone is a blob.
  • Once every threat is neutralized the mission will go to a more scripted part

Part 2

Do as it says, reach the west exit. After that follow the trail of footprints on the ground and track down Major Rocha.  But be careful as there are some stealth operators lurking on the trail. So be sure to swap to thermal on a regular basis to check the surroundings.

The first one is at the back end of the old truck

Continue following the trail.


The second one is on top of the ridge close to another car wreck, behind a plank. In the video that is where I parked my helicopter if that is of any help.

Major Rocha is close to this location, to the south-east behind a crashed airplane wreckage. Go there and finish the mission, he is camouflaged just as his stealth troops so use the thermal vision to spot him.

Hope this helps someone out there! : )
Until next time: Work to Live, Don’t Live to Work

Sunday, July 2, 2017

Tom Clancy's Ghost Recon Wildlands - The Trail


From the Fallen Ghosts DLC

Part 1: Meet Socrates' Contact

  • Go to the village where the yellow arrow is located. Sneak in, take out the few cartel members patrolling the area so that you can move freely. 
  • Go to the house that is marked on the mini-map and talk to the guy in there. 
  • Follow the trail of drag-marks and burning trash to the beach. This should be pretty straight forward but be careful just in case.
  • At the beach, talk to the witnesses. One of them will point you towards the island not far out in the lake. 

Part 2: Reach the island

This is a mission check-point... That's good as getting to the island and completing the mission is a little bit tricky. Luckily, you should have visited the place at least once before in the original game so the island should not be totally new.
What is new is all the new sniper guys guarding it.
  • Get into a boat at the beach with the witnesses. (the island is guarded by air defense, so going by sea is recommended.)
  • Use the red route shown on the map (above) to approach the island and enter at the western point. This should allow you to land without being noticed by the elite snipers.
  • Use drone to mark all the soldiers. (should not be any stealth guys here, at least not for me)
  • Remove the two on the beach that you landed on
  • Take out the elite sniper on the opposing beach (tower) as he can spot you
  • Continue inland and use the sync-shoot ability to the max and be prepared to rush and finish the job yourself if someone starts to get suspicious. Be aware of the opposing beach from where you landed and take out the marks there to be able to move slowly to the helipad. 
  • From there it should be pretty straight forward to finish the mission.

Hope this helps someone : )

Sunday, June 25, 2017

Tom Clancy's Ghost Recon Wildlands - Headhunter Western Precinct 2


From the Fallen Ghosts DLC. Find the extranjeros mole
Tom Clancy's Ghost Recon Wildlands - Headhunter Northern Precinct
Tom Clancy's Ghost Recon Wildlands - Headhunter Eastern Precinct 
Tom Clancy's Ghost Recon Wildlands - Headhunter Western Precinct 2
Tom Clancy's Ghost Recon Wildlands - Headhunter Western Precinct

This one is a little tricky, the area to search is pretty big compared to the first one.
But, easiest way. Talk to the headhunter, take a bike from him and drive up the hill to the bouchon house. See red circle on map below:

There is a huge party with lots and lots of people at the house so holster your weapon so that you don't spook them and make your way to the second floor balcony.

There you will find the guy with a hat, cross necklace and white shirt under a red decorated jacket. Take him out of play and complete the mission.
Just to make things hard, there are a lot of people wearing the same type of clothes, the key is in the details so don't shoot anyone kinda matching the description. Make sure that he has all the items in the picture.

Hope this helps!

Saturday, June 24, 2017

Tom Clancy's Ghost Recon Wildlands - Headhunter Western Precinct


From the Fallen Ghosts DLC. Find the extranjeros mole
Tom Clancy's Ghost Recon Wildlands - Headhunter Northern Precinct
Tom Clancy's Ghost Recon Wildlands - Headhunter Eastern Precinct 
Tom Clancy's Ghost Recon Wildlands - Headhunter Western Precinct 2
Tom Clancy's Ghost Recon Wildlands - Headhunter Western Precinct

This new rebel ops mission type was a blast.
A rebel supporter gives you a file containing photographic clues of a mole that you need to eliminate before the timer reaches zero.

In the Western Precinct, the clues are the following

  • Someone wearing sandals
  • On a bridge or a wharf with spice-buckets
  • RCO-IRIS on the side of the bridge with tyre hanging from a rope

Looking at the map, there are quite a few bridges within the mission area. Take out your drone and do a fly-by to locate the one with a guy wearing sandals and lots of spices. See red circle on the map below.

That's the guy. Now go eliminate him to complete the mission. Be aware of the Unidad troops in the area.

Hope this helps someone out there.


Tom Clancy's Ghost Recon Wildlands - Operation Fallen Lord


From the Fallen Ghosts DLC.

The first mission of the Fallen Ghosts DLC. I kind of skipped the Narco Road as it didn't feel like the same game at all (monster truck racing etc.)

Mission plot summary: You start at the crash site after the Fallen Ghosts intro is completed, try to rescue an agent from a shack on the mountain but he's not there so you continue with a rescue operation into an enemy base. Fly him to a rebel base and the mission is completed.

First off snipe the enemy soldiers that are closing in on your location.
After that locate the radio equipment from the wreckage. It is in one of the burning helicopter parts.
After the radio, listen to the help signal from the agent.

When closing in on the shack, look at it from a distance to see the two camouflaged enemy soldiers (Covert Ops) patrolling in front of it. You cannot use sync-shoot on them and they don't "stick" to your minimap. So snipe them from a distance once you have visual contact.

The agent is not there.

Continue up the mountain to the enemy base at the top. (Video starts here)

Be sure to eliminate the enemy sniper on the hill overlooking the entrance to the base, the snipers in the DLC are lethal.


Slowly eliminate the enemies from the gate until you are ready to free the agent from the big hangar. Use flash-bangs (don't fail as I did) to blind the heavily armored troops inside. These can only be eliminated by head-shots.
Talk to the agent, escort him to the helicopter and fly to the rebel base.


Hope this helps!

Tom Clancy's Ghost Recon Wildlands - El Muro


Plot summary: Get into the base, extract El Muro and deliver him to the rebel hideout.

Take your trusty helicopter and fly to the area, park it a bit away so that there could be a chance to use it later if needed.
I approached from the west, when closer you will get teammates talking about small arms fire, Santa Blanca and Unidad are already fighting in the area. Take out the hostiles that are around the APC outside of the gates and commandeer the APC.
Drive to where El Muro is (the flight tower), and just grab him. The area is a bit chaotic so try to make this quick and be careful, use the APC as cover when needed. Once El Muro is stowed in the APC, leave the area, try to just drive straight out from the base and continue towards your helicopter. With some luck the Unidad patrol level will be lost and you can re-stow El Muro in the helicopter and fly him to the rebel base.
This is Media Luna, so make sure you do not try to fly in a straight line to the base, fly towards the big lake in the south west and from there to the base to avoid SAM sites.

Hope this helps.

Friday, June 23, 2017

Tom Clancy's Ghost Recon Wildlands - The Mole


This mission is locked up after completion of The Black Site.

Main plot of the mission is to locate the Unidad captain and follow him to the meet with the Mole, and finally to take down the Mole.

Fly to the base where the Captain is rumored to be, land outside the base and do a quick flyby with the drone to locate him, use rebel ops Spotting if you have a hard time finding him.
Fly behind the captain as he drives to the lodge in the mountains, You must be within 300 meters or the clock will start ticking down from 20 seconds. If it reaches 0 you will fail the mission.


Once at the lodge, land and sneak up to the meet and snipe the Mole.

Hope this helps : )

Tom Clancy's Ghost Recon Wildlands - The Trail of the General


This mission is locked up after completion of The Black Site.

Main mission plot is to break into the jail inside of an Unidad base and have a little chat with one of the inmates, no need to rescue him, just get there and talk to him and the mission is completed.

My point of entry was from the south. 
  • Take a car and drive through the outer perimeter. This should not raise any kind of alarm or suspicion.
  • After clearing out the snipers in the towers overlooking the wall, get close find the part with no barbed-wire and some boxes. Se picture below:
  • Make sure you time the wall climbing with the help of your drone and well placed sync-shoots to eliminate patrols
  • Eliminate enemies on the roof of the jail before entering. Especially the mortar team. Eliminate as many as you can of the patrols that have the roof top on their route. Take your time.
  • Climb over the wall and head right towards the door in the fence towards the jail. Ignore the fact that I tried to use a vehicle to get over the wall at some other part in the video, Not going to work (at least in this version).
  • Make sure that eventual patrols on are neutralized before you push the button that opens the door in the fence.
  • Inside the building there are a number of jail cells. The lieutenant is located on the bottom floor on the northern wing of the house. See mini-map below.

  • Talk to the guy. 
  • Done
After you've talked with the guy, you complete the mission. But to leave the area in a safe way (no teleportation from an area of combat right? ; )) locate the helicopter on the roof of the jail, call in mortar on the SAM-site and take off.


Hope this was helpful. : )

Tom Clancy's Ghost Recon Wildlands - The Black Site


The Black Site mission is about gaining access to a highly secured computer terminal inside one of the larger Unidad bases. The mission is a little bit sneaky as the mission area moves a little once you arrive at the original location. I guess you could find the entrance inside the main base but I managed to start the big alarm there and had to retreat. Luckily I looked at the map again at this point and noticed that the mission area had moved and took my chances with a smaller outpost to the north of the main base. 

Eliminate all troops at the outpost without raising the alarm and then move down the staircase to the underground base. Watch out for patrol cars in the tunnels.
The laptop is located on a balcony above the area where one heavy and two normal Unidad soldiers hang out. Just climb the stair and start the hacking attempt.
Once started, you'll have to guard the area for 2 minutes. Just stay on the balcony and take out the approaching troops.
Once completed, climb the stairs again and steal an Unidad vehicle and just drive out the main gates.

This mission unlocks the The Mole and The Trail of the General missions.

Hope this helps  : )

Tom Clancy's Ghost Recon Wildlands - Sandoval's Remains


A lot of flying in the beginning of this video, to jump straight into the action you can go to 4:16.

The mission is pretty much straight forward, go to the outpost and locate Sandoval's Remains and call back home with the location.
I don't know if the remains are always at the same location but I found them in a cargo container close to the main gate.

Hope this helps someone out there : )

Monday, June 19, 2017

First Impressions - Divinity: Original Sin - Enhanced Edition


We bought a new game yesterday. Found it in the used section of gamestop and googled a little on the phone. The impression I got was that it was some kind of Diablo clone and we both loved Diablo 3 on the Xbox 360. Said and done, we bought it.

Divinity: Original Sin - Enhanced Edition is NOT Diablo. Not even close! Had I known that the battle was turn based I would have left it in the store... Luckily I didn't.

Character creation


We spent a total of 15 minutes here the first time. Mostly because of a phone call, but also thanks to all the available options. .

Start of the game

The game starts and we are lost! What do we do now? Going through the controls and trying to figure out stuff. After some wandering we encounter our first enemy and it turns out that the game is turn based! What?
We both feel a little lost in with the combat system, when the encounter is over one of our hand controls dies and we restart the game a couple of times before we fingure out how to start split screen again, Evidently its the '' button. Bad design is that the characters are moved around to the player that has a working controller, and before we find the menu where to assign characters to players again a lot of time passes.

After that we find the entrance to the 'Tutorial Dungeon'.

Moving through the dungeon things start to make sense and the controls are hammered into our fingers. A lot of the game mechanics are described in a neat and time compact way. So there, a little bit of new gear and experience, but most of all a playable game.

First impressions

Divinity: Original Sin - Enhanced Edition is not a Diablo clone, more like an arcade version of Baldurs Gate. The coming few weeks will kind of give the ultimate review in the form 'if we play it again'.


Tom Clancy's Ghost Recon Wildlands - El Yayo


OK, this is a longer mission with 2 distinct parts where the first part centers around grabbing El Yayo from his house arrest and the second part is about doing him a favor to get him talking.

Part 1
  1. Locate the house and land in the fields outside.
  2. Take out the two patrols on the back side of the house, don't take too long between them as they will alert the rest of the gang that will execute El Yayo. I.e. remain hidden.
  3. Drone locate the remaining forces, use spotting if you have it.
  4. There should be 4 more outside, just time it correctly and you can take out the one on the balcony and the two in the yard. The one guarding the door into the house can be sniped.
  5. Take out the guy on the bottom floor of the house
  6. Grab El Yayo and escort him to the helicopter and fly to the safe house

Part 2

Here you have to rescue El Yayos family from a village with a lot of cartel members. I kind of failed and had to do a full on assault with the help of the rebels. Take them out, find the jail cell where the targets are held and escort them to the helicopter and fly back to the hideout.

Hope this helps somone : )


Tom Clancy's Ghost Recon Wildlands - Nidia Flores


'
This mission opens after completion of the El Boquita mission.

After killing El Boquita and destroying the convoy, it is time to air lift Nidia Flores from the grips of the cartel.

Depending on your strategy, this can be done pretty quick.
My strategy was to perform a quick grab and go, so if you are still close to El Boquita, steal the gunship that is located in that village and fly over to Nidias mansion.

Just approach the building slowly, order your team to assault and hope that they gun down some of the welcome party.
Land the helicopter next to the landing zone on the roof (see picture below)
If you manage to crash the helicopter as I did, at least you have a replacement close by.
Request a spotting from the rebels and rush to grab Nidia Flores, her kid will follow you and enter the helicopter after you stow her.
If the cartel is overpowered at any point, just request for a diversion and gun-team to even the odds a little.

Then just fly to the rebel hideout that is targeted.

Hope this helps someone out there.

Tom Clancy's Ghost Recon Wildlands - El Boquita


Another mission in Koani. This time Nidia Flores right hand man, El Boquita.

The mission is pretty much a stalking game followed by a show of force. Once you find out the location of El Boquita by talking to the rebel at the mine, get a helicopter and fly to the wind carved rock formation to the north of the outpost where the target is rumored to be.
This is a good time to use the Rebel Support skill Spotting. Once you have a confirmed location, get back into your helicopter. A countdown of 20 seconds will start (as you are too far away from the target), so fly a bit closer and try to hold a distance of 150 meters to the target.

Once he drives into the base with a lot of red trucks on the mini-map and a hovering helicopter, fly past it and prepare for a ground assault. I tried to time a mortar strike but failed. 
Once the convoy approaches, make sure you destroy the truck first as that is part of the mission. If it gets away, you fail.
Clear the area of helicopters and ground vehicles once the truck is out of play. If all goes well, you should lose the engaged and hunted status once all enemies are out of play.


Next part of the mission is to find and retire El Boquita himself. He is holed up in the little village beside your previous combat zone. Just sneak in, or engage with rebels (up to you). Just make sure that he doesn't walk away. When I did the mission, he was on the top floor trying to shot from the balcony.

After completion of this mission, the Nidia Flores mission becomes available. If you plan on doing it directly afterwards be sure to grab the gunship helicopter from this village.

Hope this helps : )


Tom Clancy's Ghost Recon Wildlands - The Convoy


This mission follows by the intel that was gathered from the Truck Depot.

This is a standard ambush the convoy mission camouflaged as a Story Mission. I kind of miss judged the location of the convoy and they pretty much ambushed me instead.
Nothing fancy to be said here, the path that they follow seems to be going over the salt desert, see the reddish highlighted path on the map below.

Hope this helps  : )

Featured Post

the Hunter Call of the Wild - Fleischer #3 session two

Session two of the Fleischer #3 mission where the goal is to Travel to Bohndorf Hill Harvest 2 red deer at night No luck this tim...